
DIY - Outdoor Chairs Makeover
A couple of weeks ago on garbage night my husband and I noticed our neighbors put out two patio chairs next to their cans. Jake looked at me and asked, "Are they throwing those away?" "I guess so." He got pretty excited and ran over there to ask if we could take them.
There was a reason they had these chairs out by the garbage cans. Every bit of metal (which is the entire chair except for the seat cushion) was covered in rust. Tons of rust! And the fabric was quite nasty as well. We were still excited though. We saw potential and we liked the bones. That weekend we went to the fabric store and selected some outdoor fabric then stopped by the hardware store to get some outdoor paint to coordinate. I was pleasantly surprised and tickled that Jake readily agreed to the flamingo print fabric. I have had a small thing for flamingos since high school that tends to resurface now and then (which has been often lately).
Our end result is fabulous! We wanted some chairs for the front porch and now we have the cutest ones in our neighborhood. We will need to keep an eye on our neighbors and make sure they don't take them back! Fixing up chairs sounds intimidating, but really it is simple. So cruise your neighborhood on garbage night, go to a thrift store or garage sale and pick up some discarded chairs then follow the directions below.
MATERIALS: wire brush or sandpaper, old rag, outdoor paint, outdoor fabric, scissors, staple gun and staples, hammer, screwdriver or drill and screws.
DIRECTIONS: Remove the seat cushion. These are usually attached underneath with screws.
Using the wire brush or sandpaper, rub down the rusty metal to remove all unwanted flaky/loose bits and then wipe it down with the rag to remove the dust. I recommend wearing a safety mask because old paints and materials can be harmful.
Spray paint the chair frame. This may take two or three coats. Be sure to follow the directions on the can and allow enough drying time between coats and handling. Also, do not spray too much at once or you will get drips which are unattractive.
In this scenario, there was another layer of fabric beneath the first layer. It looked clean enough, and we didn't feel like taking the second layer off so we left it on and covered it like who ever recovered it last time, our neighbors perhaps?
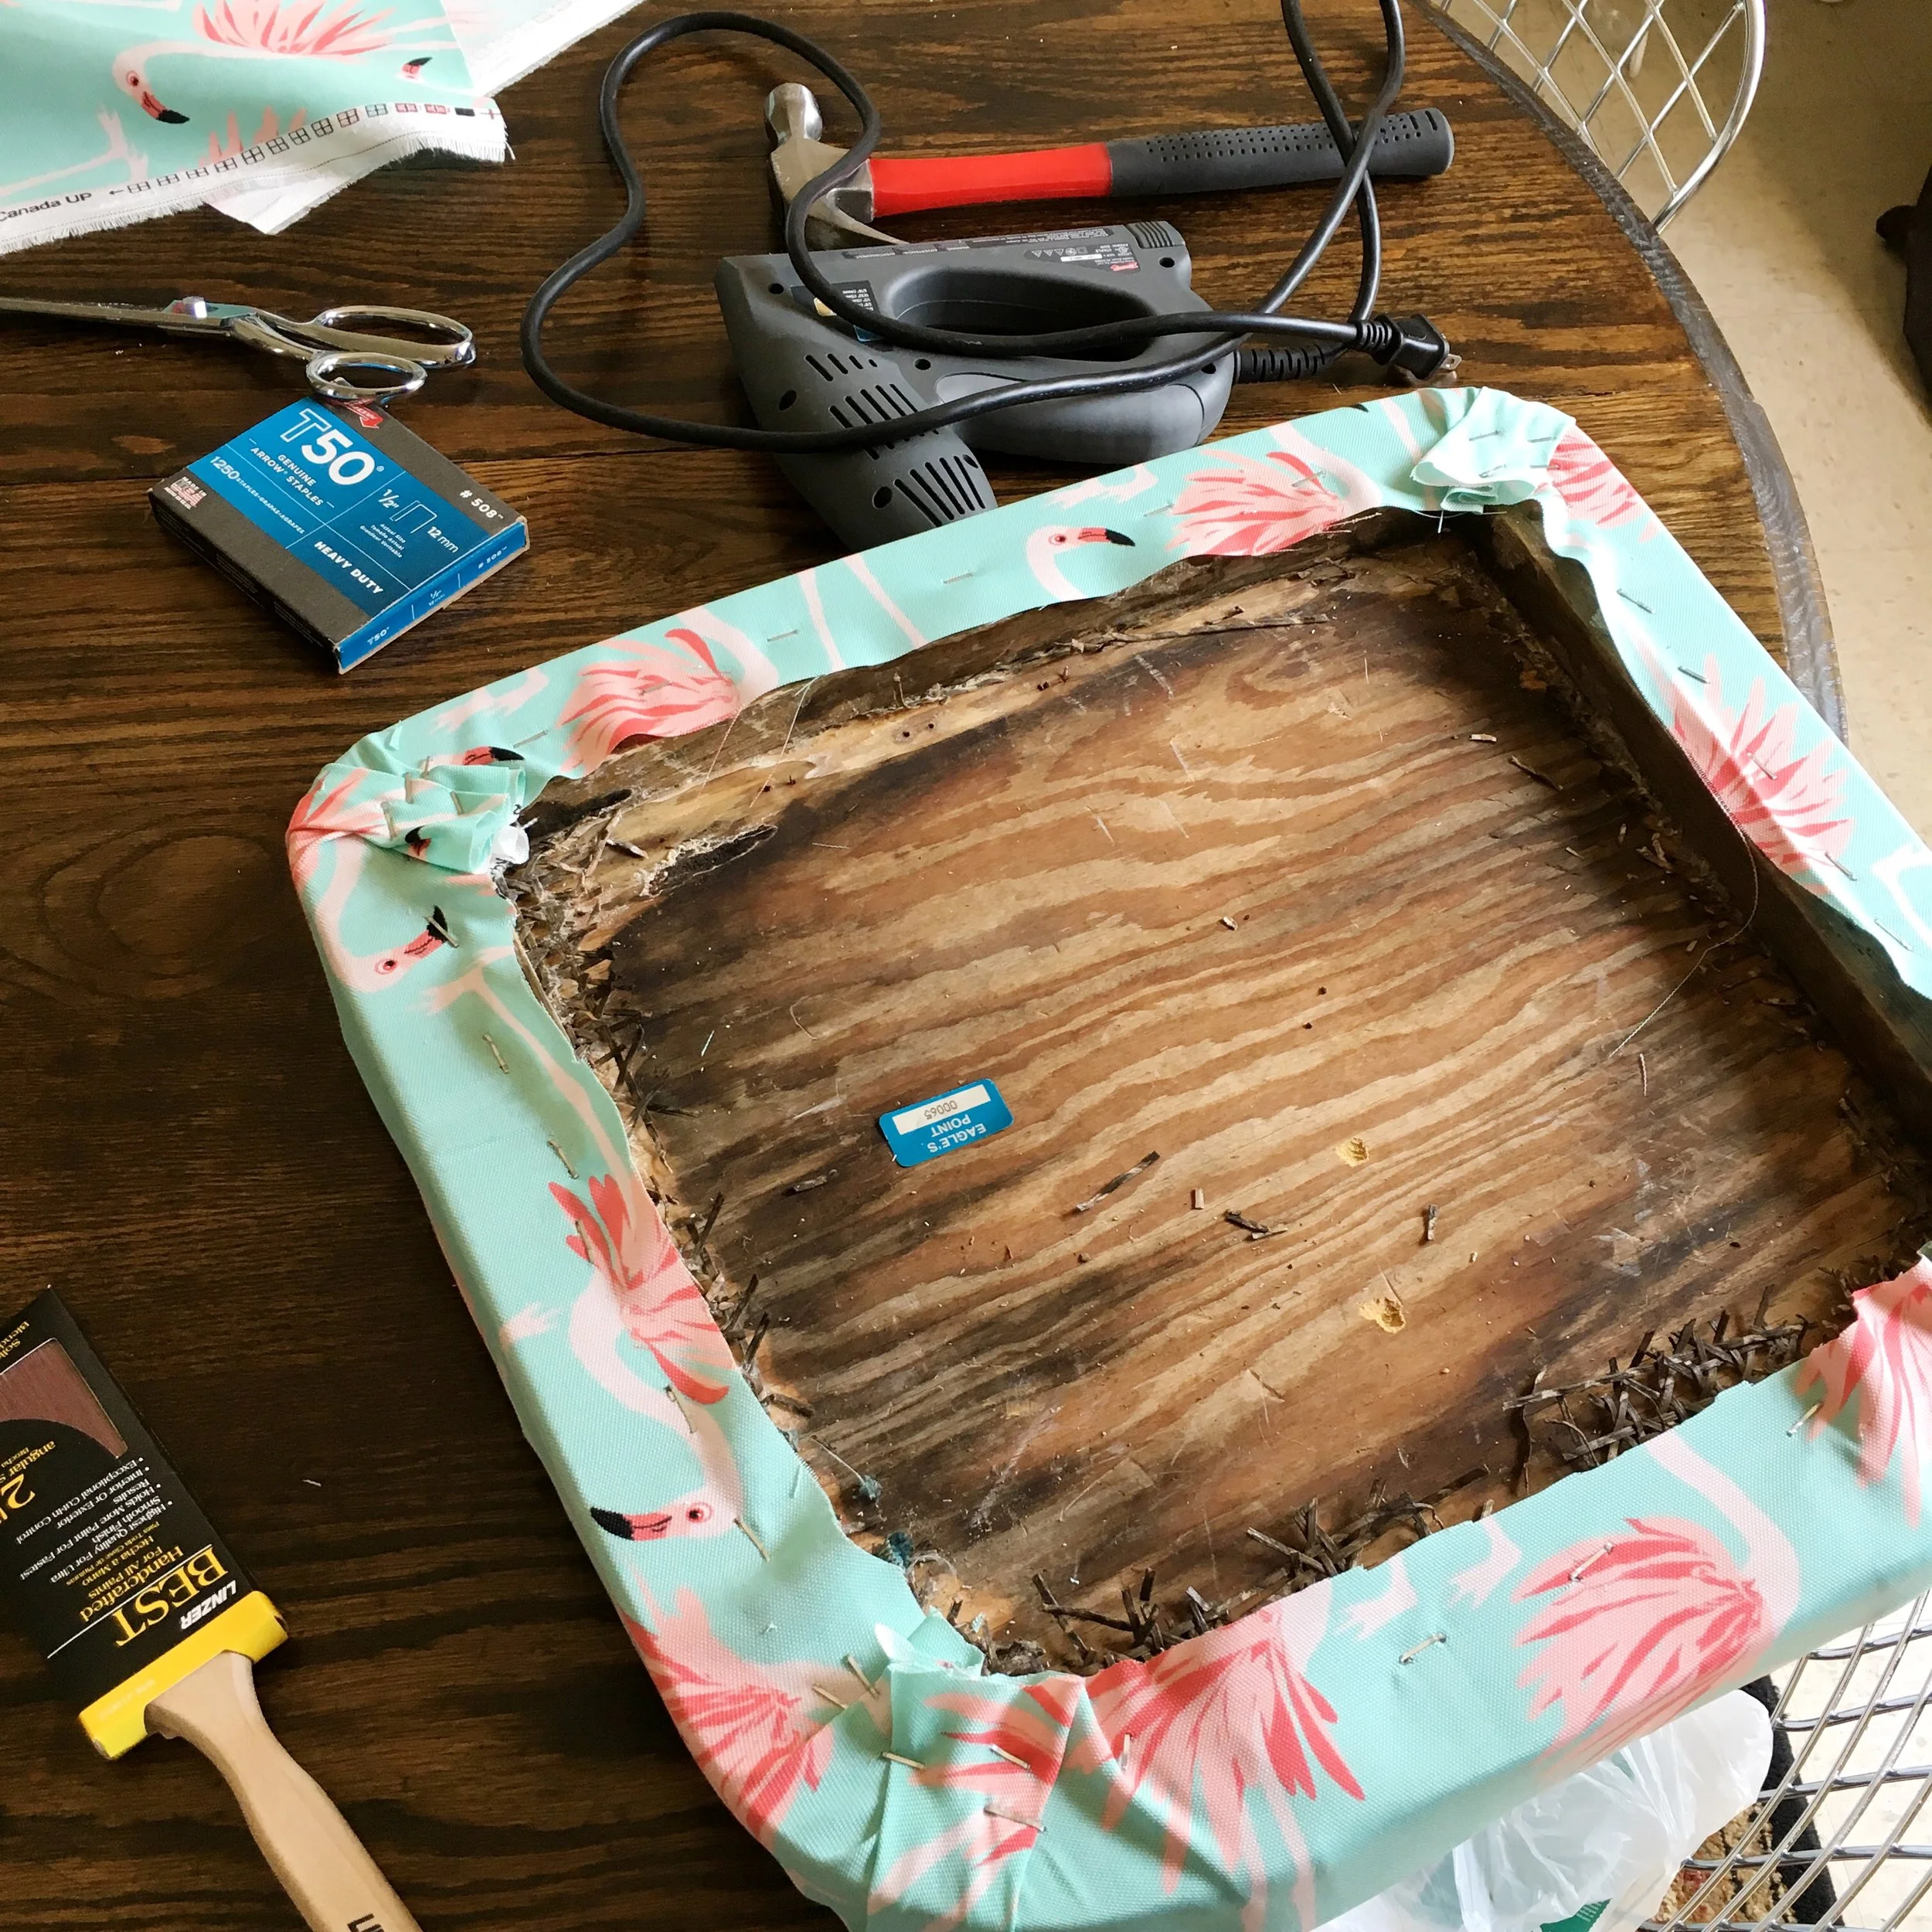
Remove the fabric from the cushion. That is normally attached with staples on the bottom. I use a flathead screwdriver and pliers to pry those out. Be careful and wear gloves, especially if they are rusty!
Using the old fabric as a template, cut your new fabric to the right size. I usually give an extra inch or two so I have enough fabric to grab on to.
Lay the fabric upside down then lay the seat cushion upside down on top of the new fabric. If your fabric has a print, make sure it is oriented correctly (and straight) so when you flip the cushion over and place it on the chair, the pattern will be facing the right direction.
Pull one side of the fabric up and, starting in the middle, staple the fabric to the cushion frame. Be sure to keep the fabric straight, smooth, and tight. Pll the opposite side up and while pulling it as tight as you can without creating odd dimples in the cushion, staple it to the cushion frame in the same manner (starting in the middle and working your way out). The fabric may look a little puckered at the point but it will work itself out in the next step.
Grab one of the unstapled sides and repeat the same process, keeping it tight. Repeat again with the last side. You should now have only the corners remaining.
To attatch the corners, I recommend playing with the fabric and figuring out what works and looks best. There are a lot of options that all look great. My corners were secured by pinching the fabric in the middle, smoothing out and flattening the top of that fabric, then pulling it tight towards the center of the cushion. See the image below for a visual on what I'm trying to describe.
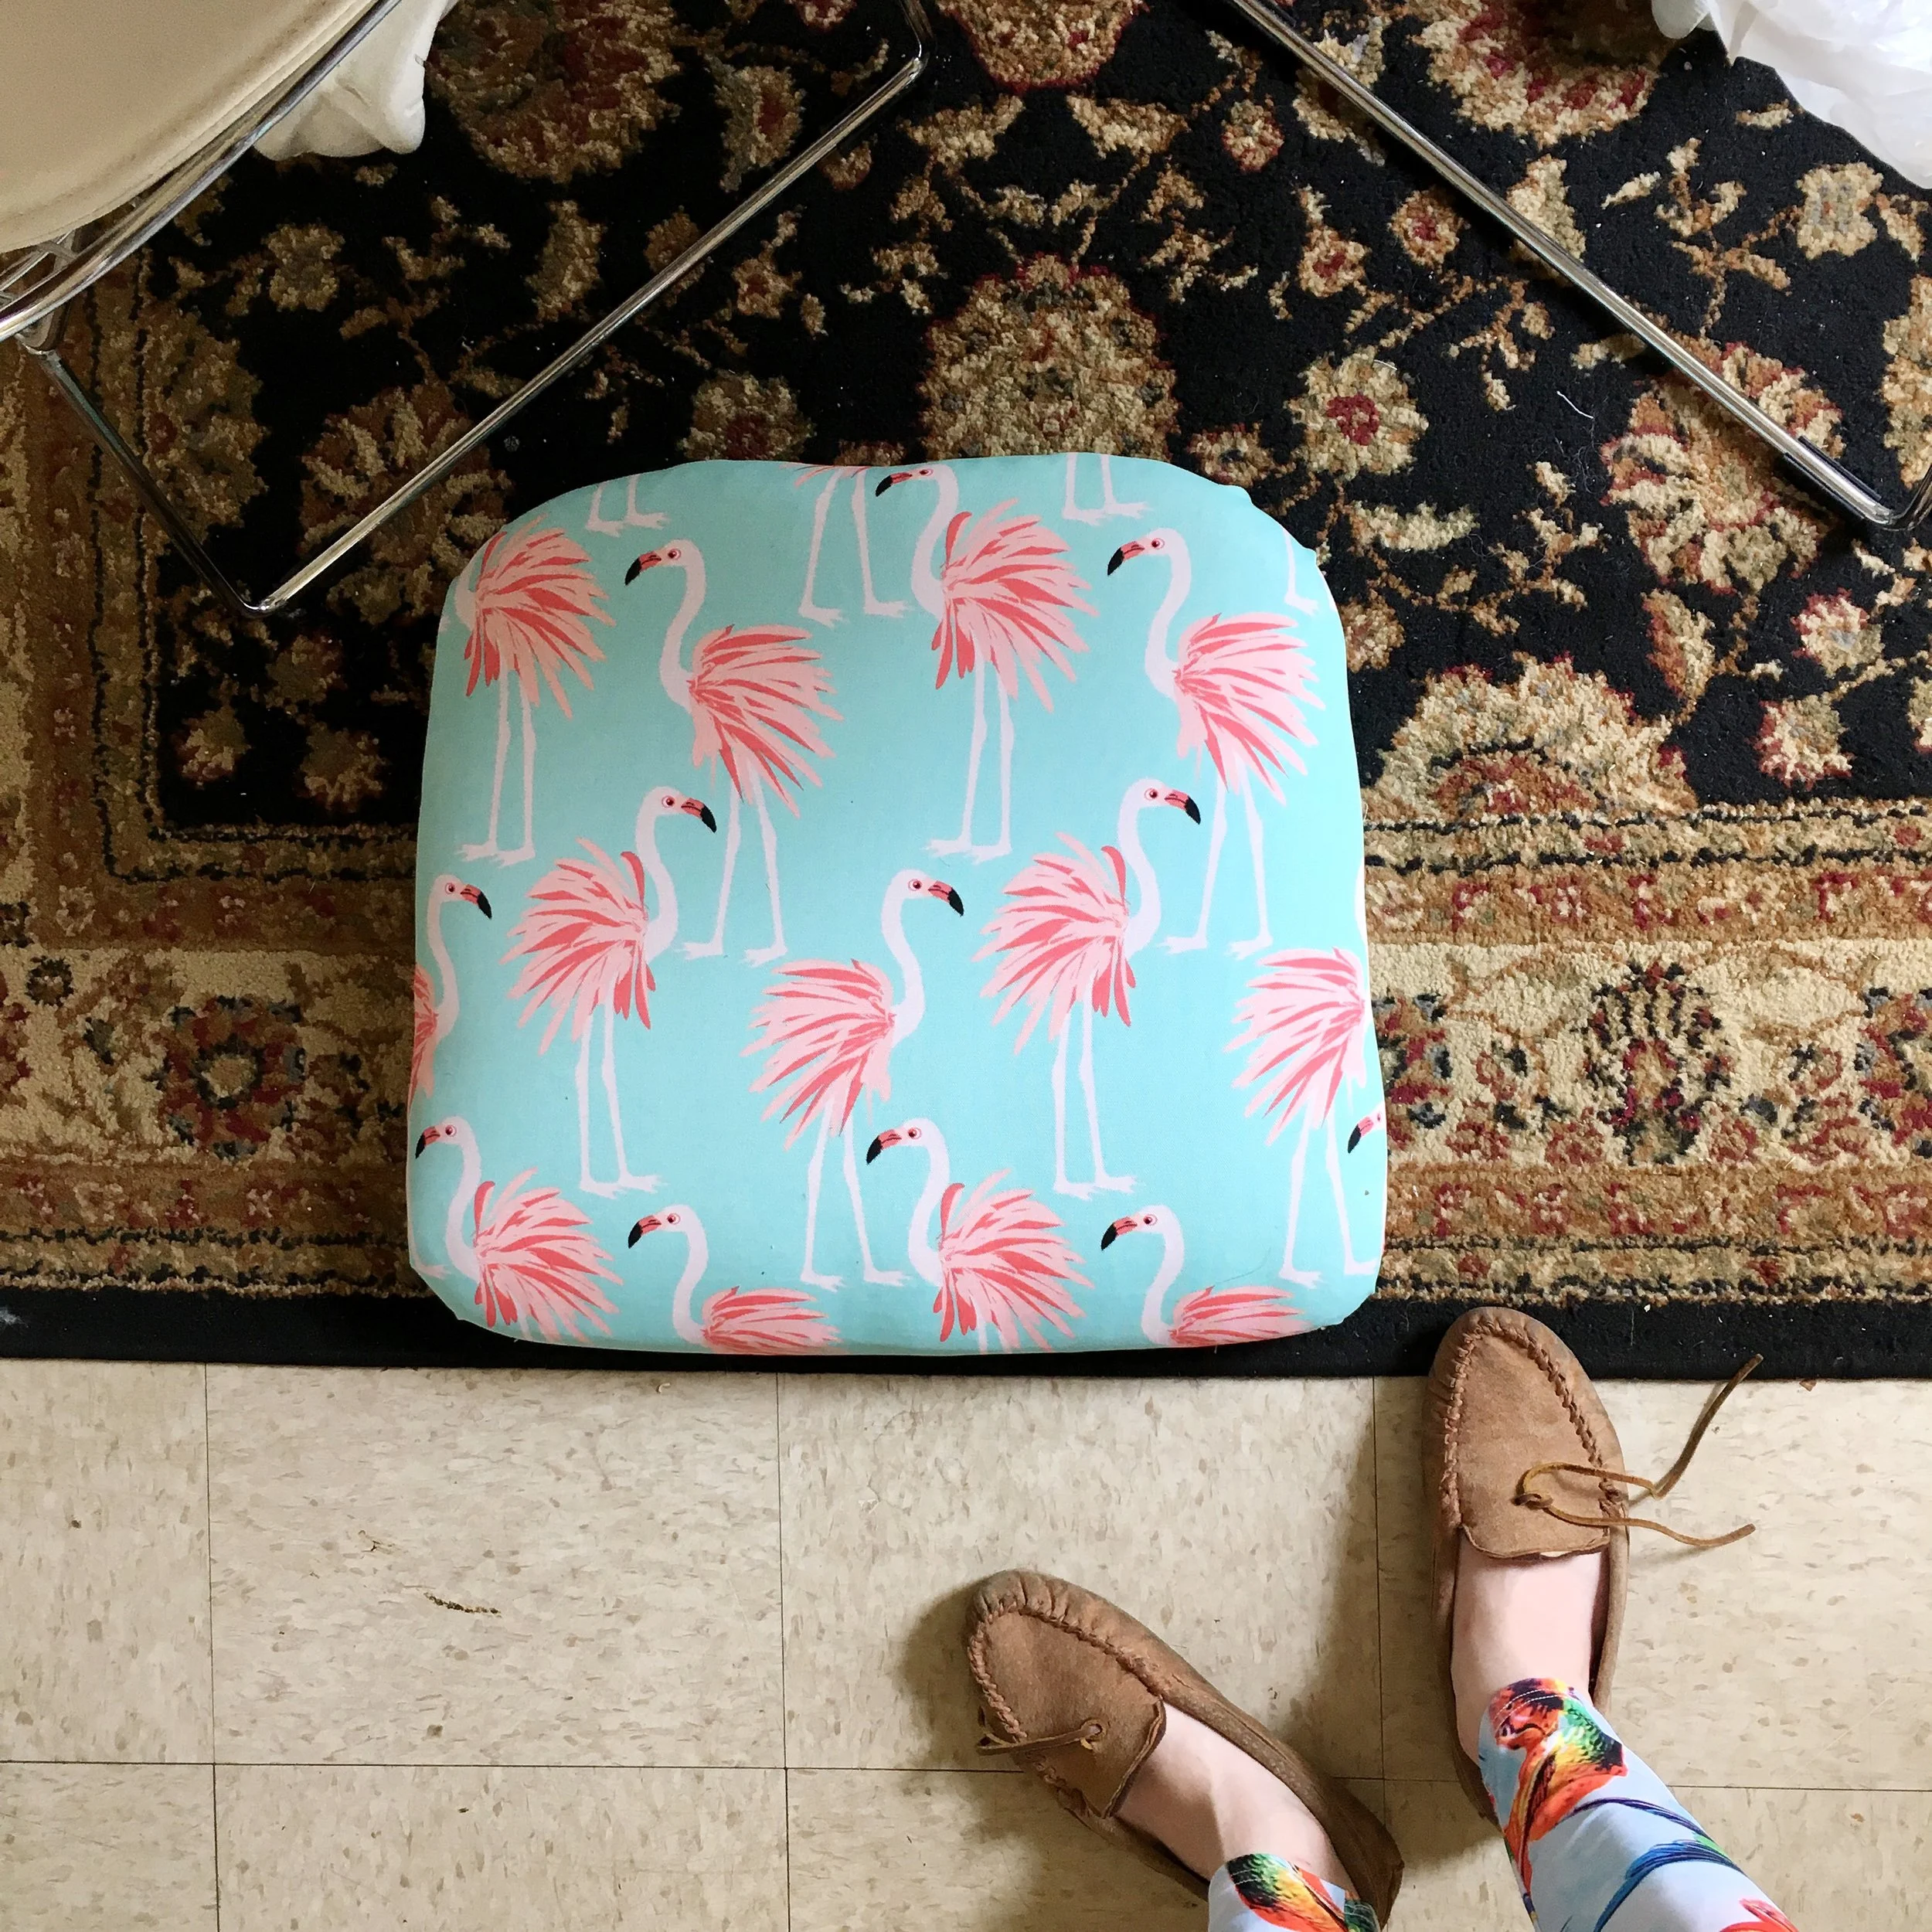
Once the fabric is secured to the cushion, go ahead and trim off the extra. When the chairs are dried, place the cushions on the base and secure it with screws. And you're done!
Every chair is slightly different so the steps may also be a little different than mine, but they are all similar. Simply document your steps by taking pictures along the way so that you can remember how to reassemble.
Have fun!
_Trendy Puku_