
DIY - Concrete Planters
Concrete planters are all over Pinterest. Everyone makes them look so simple and great. Naturally I needed to try. My experience was mixed. They are simple and great if you use the right materials.
MATERIALS: Concrete mix, water, bucket, stirring stick, non-stick spray and molds. Optional materials: metal file, felt and glue.
Make sure the molds are made of plastic. No aluminum or metal of any kind. It is too difficult to remove the set concrete from the metal molds. I found any plastic container or glossy paper carton (ice cream or juice cartons for example) work the best. They can be cut or torn off of the set concrete easily. I learned this the hard way. After spending an afternoon making planters, all of the planters that I used soda cans as the inside mold sat in the garage for a couple months before I gathered up enough courage to deal with them. To remove the cans, I had to use a utility knife and cut it out as best as I could. The bottom portion remained in the planter due to difficulty getting it out. Any planters that I used cardboard as the mold had paper stuck on the outside and the cardboard left a texture on the concrete. So in the end I recommend plastic and glossy paper!
Also be sure to select the right concrete mix. I read on another blog about their bad experience using the wrong mix. When they removed the set concrete from the molds, it crumbled to pieces. I used this cement mix. It worked well and there was enough mix for a lot of planters.
DIRECTIONS: Lightly coat the molds with the non-stick spray. Mix the concrete according to the ratio on the package. I found the consistency ended up being similar to pancake batter. Immediately pour the mix into the larger mold filling it about 2/3-rds full. Take your smaller mold and press it in the center. Use water or a few rocks to weigh it down so it does not float to the top. Set aside for 24 hours to set and dry. Cut or peel the molds away and you have a planter! The tops and edges may be a little rough. Smooth them down with a metal file. It will not be as smooth as though the concrete was poured perfectly, but it will look a lot cleaner and is not as sharp as the rough edges. To prevent the planters from scratching my furniture, I glued a piece of felt on the bottom.
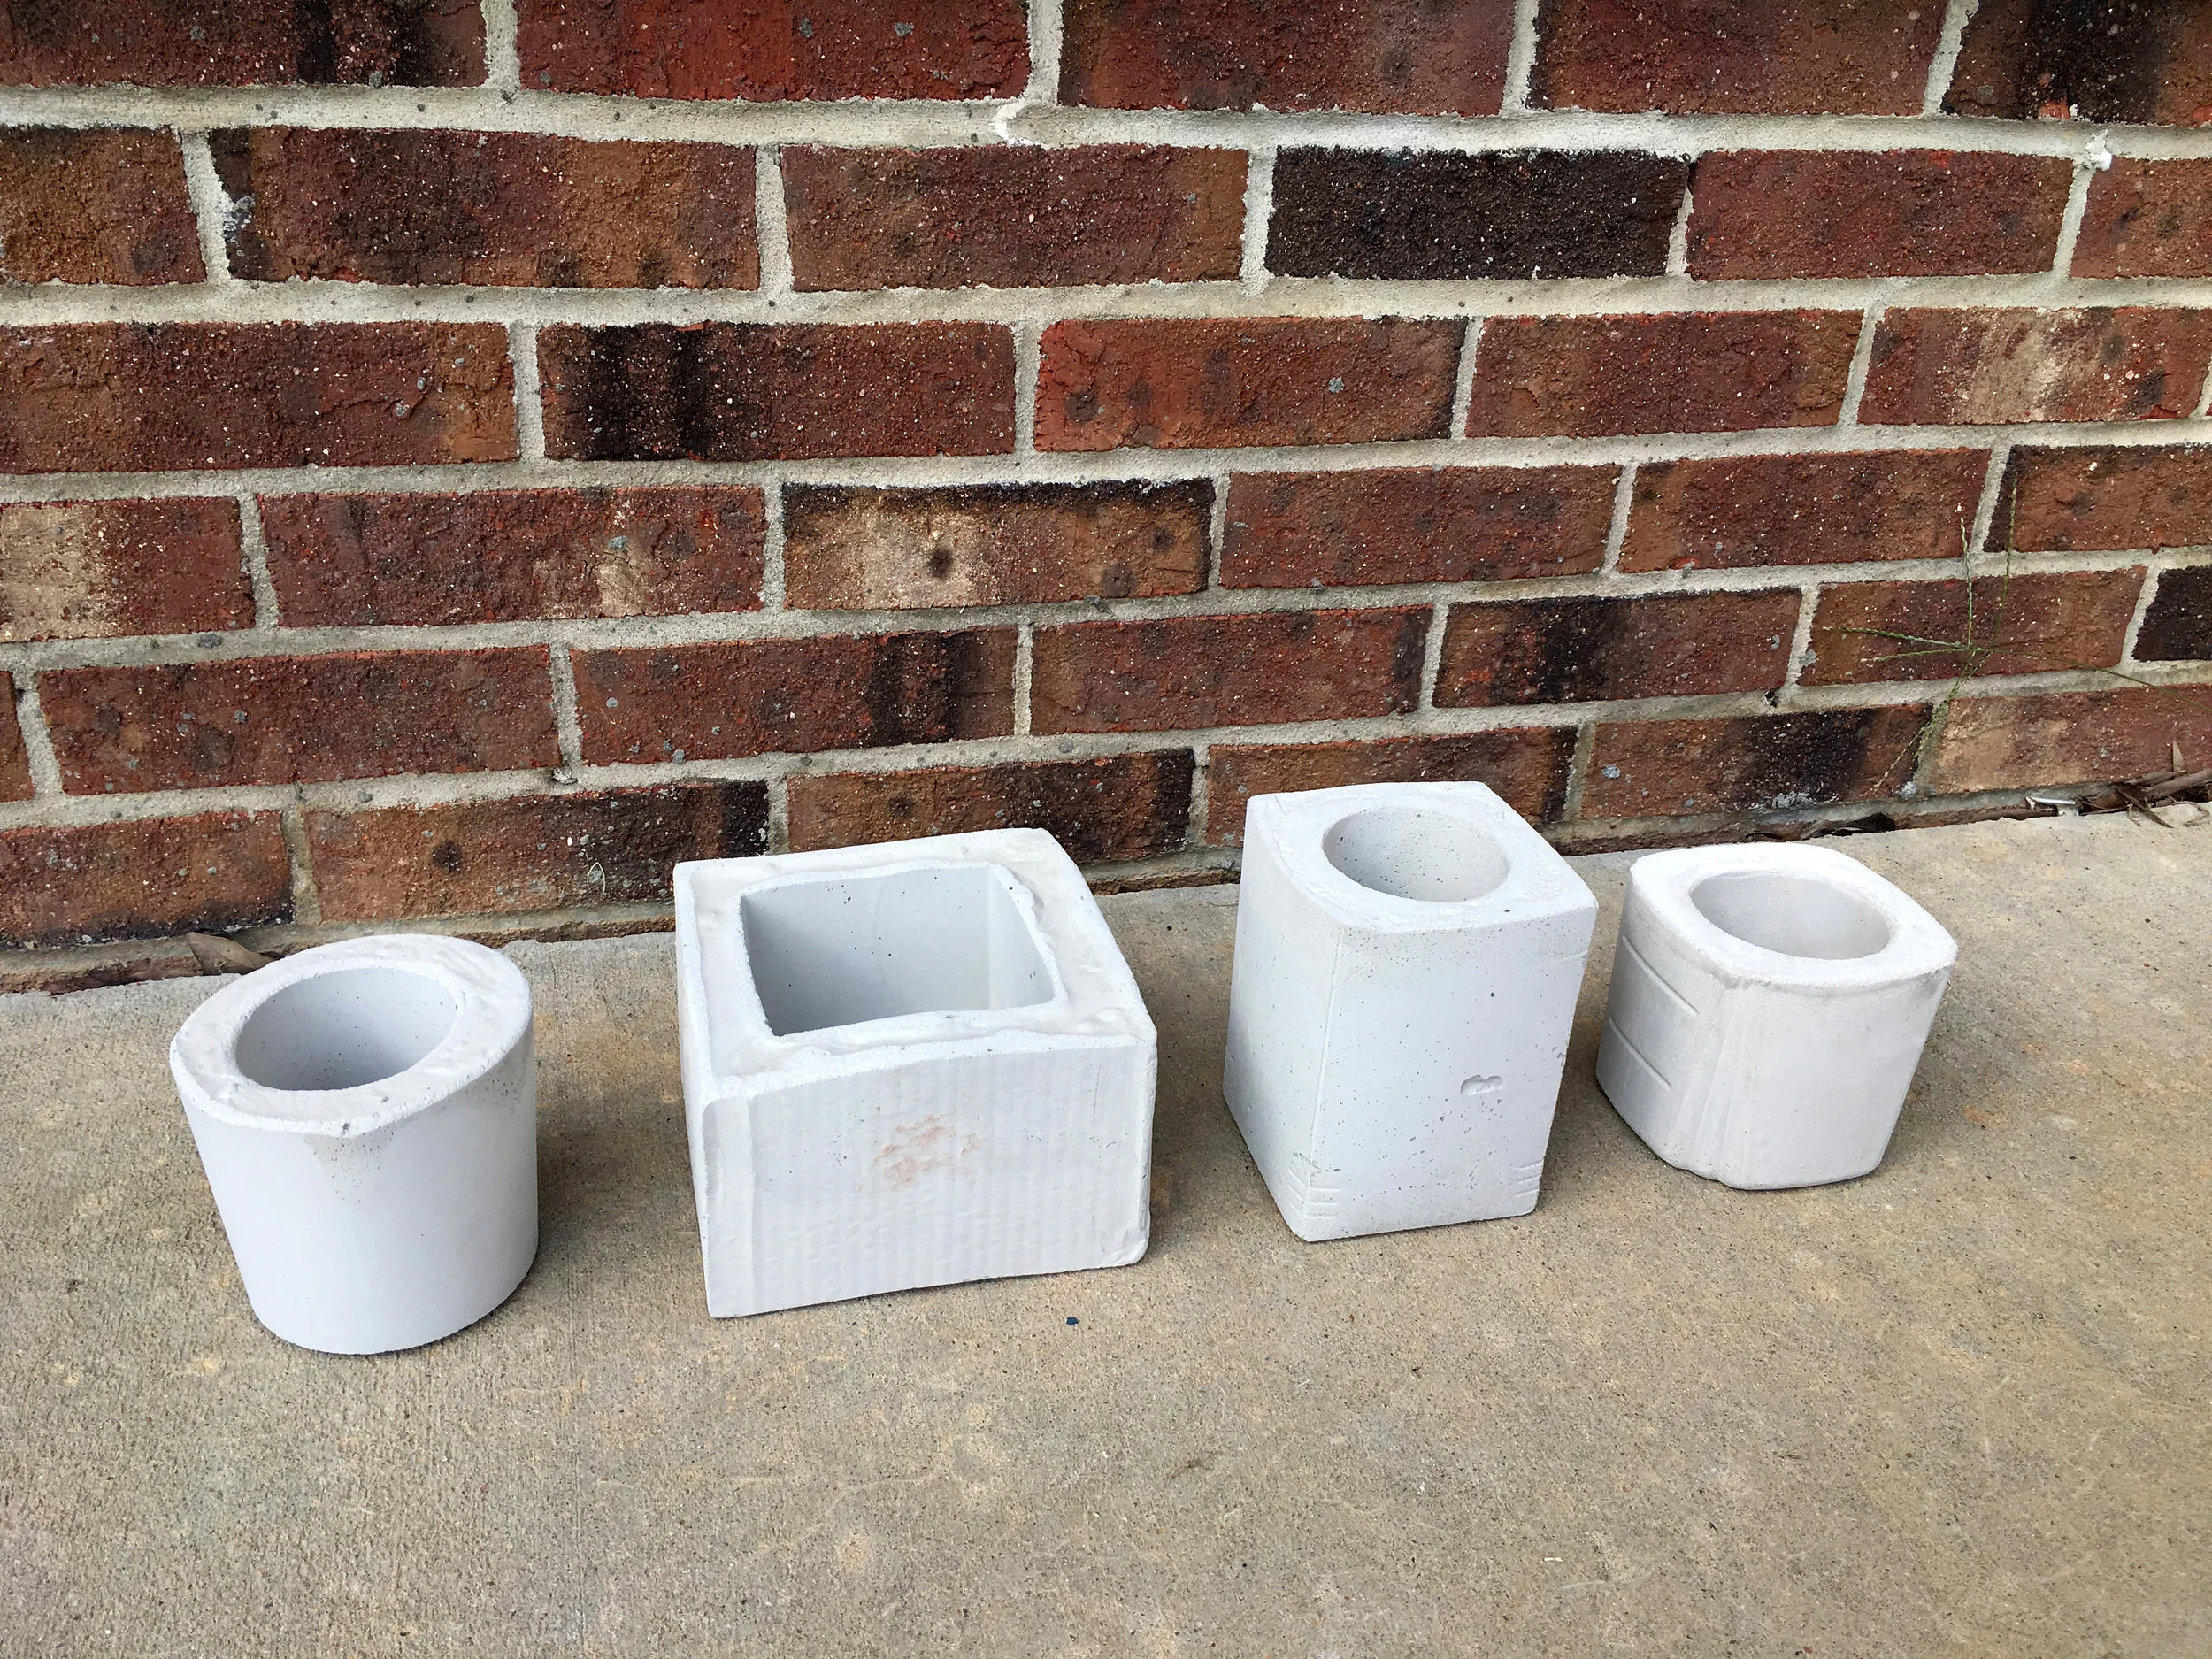
These are the results from my first try at making concrete planters. It was a little rough, but fun and satisfying enough that I wanted to try again.

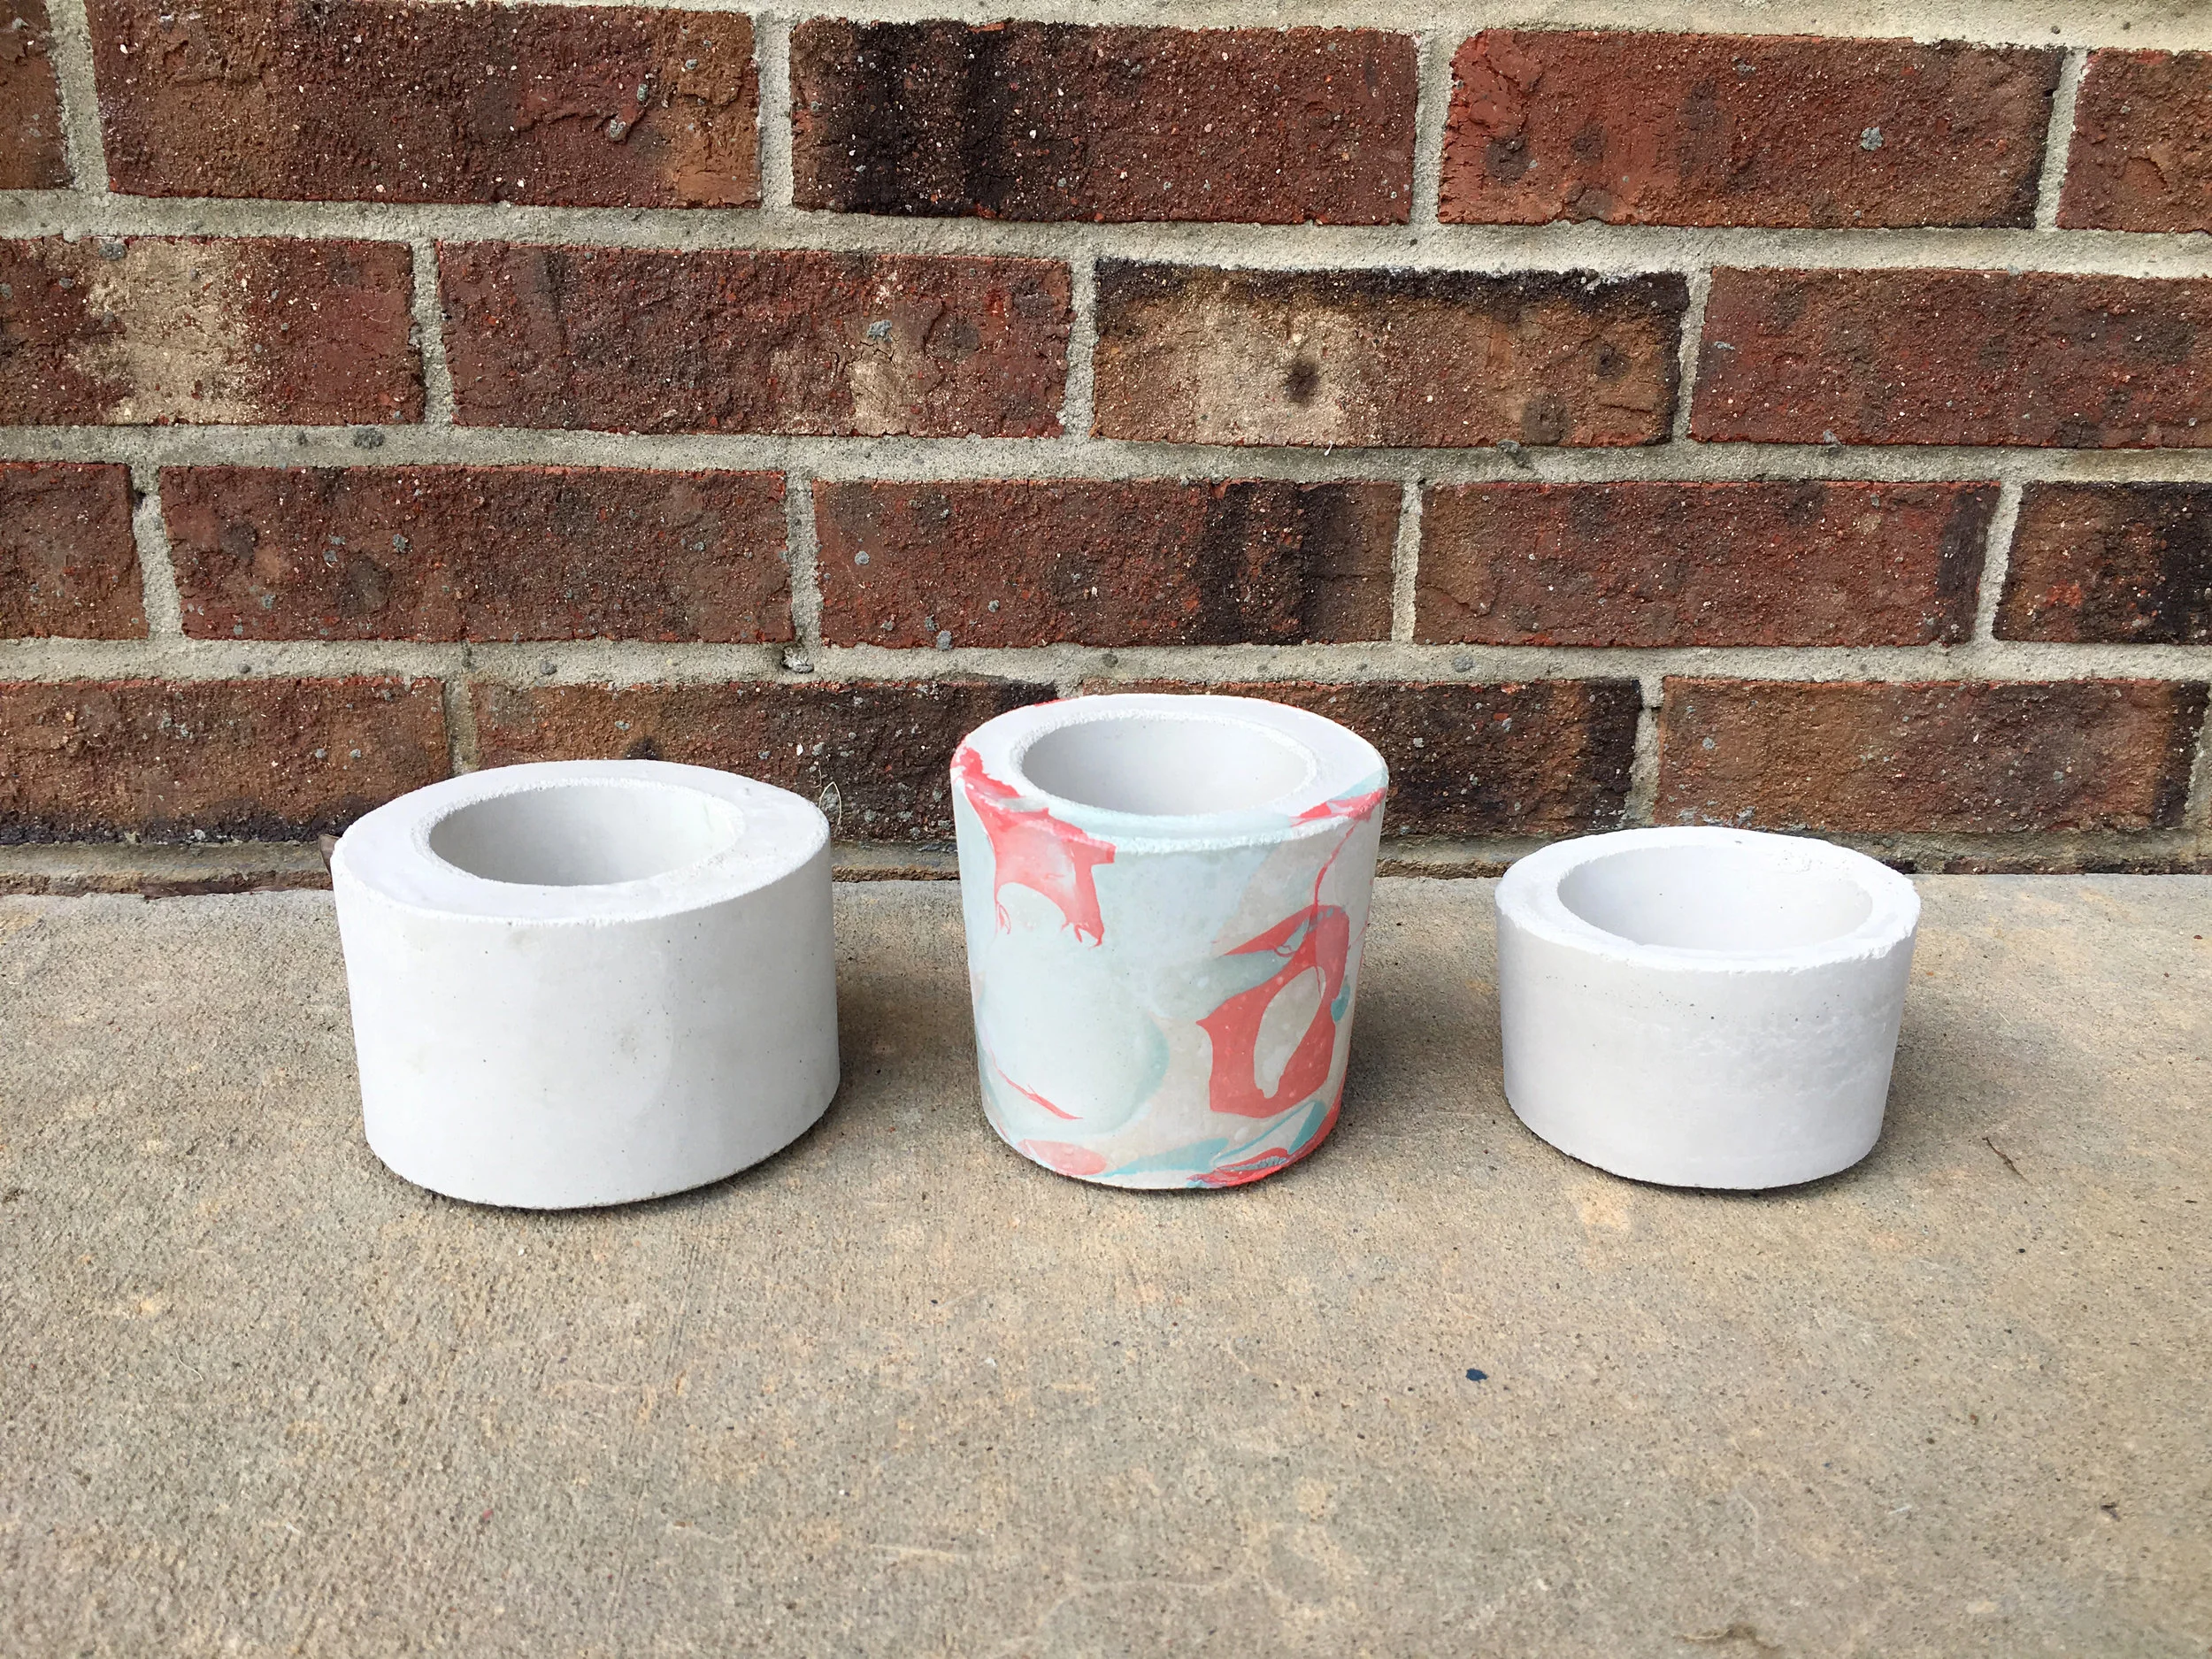
These are the results from my second round. It was a much quicker and smoother process!

This view shows the inside of the planters. You can see three that I could not remove the aluminum can completely and one where the bottom of a paper cup was stuck because of the lip around the bottom.
I wanted to experiment with painting the planters so I tried a marbling technique found here using nail polish as the paint. It turned out alright. At first I thought it did not work because the marbling would peel off when I touched it. I let it sit and dry for 24 hours, planning on peeling it all off, but it dried and stuck to the concrete. It has a few bubbles in it so the technique is not perfect, but it is easy and inexpensive because all the tools are available on hand. I would like to keep playing with the marbling to see if I can get something to work.
We gifted a few planters as Christmas gifts this last year and I decided to try painting them freehand with patterns. I love the results. I used acrylic paint (what I had in my closet) and I found it a little difficult to create clean lines. I believe my paint was too thick, it is really old paint. I made it work and they look great.


I also experimented with pouring concrete into the lids from ice cream containers. I thought they could be awesome coasters. Unfortunately they did not dry flat (the lids have a rim around the edges causing the top, flat portion to sag under the weight of the concrete, curse you gravity!). Being the thrifty one I am, I thought they would make cute garden stones. I painted Freya's hand and had her slap it on each one to gift to her grandparents. All of her grandparents are avid gardeners, how lucky is that! They turned out cute and by the last one, she was starting to understand the concept and didn't wiggle her fingers as much. They are not perfect, but hopefully they make her grandparents smile every time they go out to work in the garden.
There will be future concrete posts. I had a lot of fun and there are many more possibilities out there.
Have fun!
_Puku_